Step-by-Step Guide: Applying Xpert Films to Your Vehicle Like a Pro
2025-10-05
Step-by-Step Guide: Applying Xpert Films to Your Vehicle Like a Pro
Table of Contents
- 1. Introduction to Xpert Films
- 2. Benefits of Applying Xpert Films
- 3. Tools Required for Application
- 4. Preparing Your Vehicle for Film Application
- 5. Step-by-Step Application Process
- 6. Finishing Touches After Application
- 7. Maintaining Your Xpert Films
- 8. Frequently Asked Questions
- 9. Conclusion
1. Introduction to Xpert Films
Xpert Films are premium automotive films designed to enhance the aesthetic and protective qualities of your vehicle. They offer a blend of style and functionality, allowing car owners to personalize their vehicles while protecting them from environmental damage. In this guide, we will walk you through the entire process of applying Xpert Films, ensuring a professional-grade finish.
2. Benefits of Applying Xpert Films
Applying Xpert Films provides numerous advantages:
- Enhanced Appearance: Xpert Films come in various finishes and colors, allowing you to customize your vehicle’s look.
- UV Protection: These films protect against harmful UV rays, preventing paint fading and interior damage.
- Scratch Resistance: Xpert Films are engineered to resist scratches and scuffs, keeping your vehicle looking pristine.
- Easy Removal: Should you wish to change your vehicle's appearance, Xpert Films can be removed without damaging the underlying paint.
3. Tools Required for Application
Before diving into the application process, gather the following tools:
- Heat Gun: Essential for shaping the film around curves and edges.
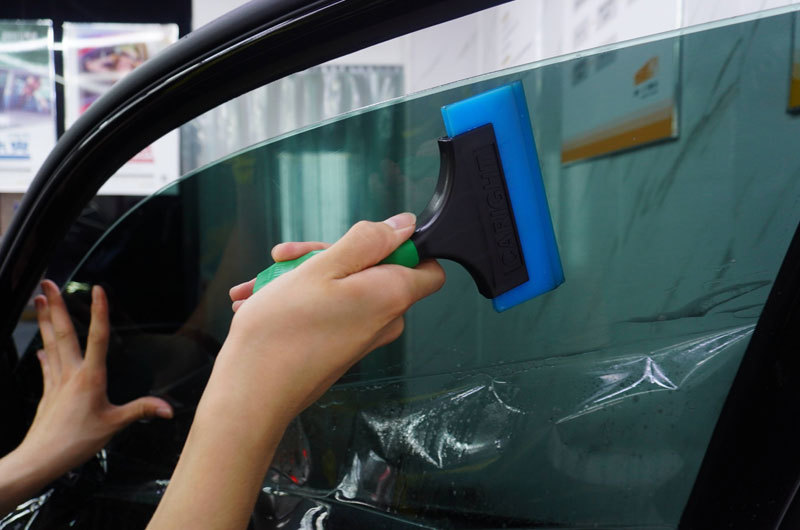
- Application Squeegee: Helps to smooth out bubbles and ensure proper adhesion.
- Utility Knife: Used for trimming excess film after application.
- Spray Bottle: Fill with a mixture of water and a few drops of dish soap to facilitate application.
- Microfiber Cloths: For cleaning surfaces and wiping down the film once applied.
4. Preparing Your Vehicle for Film Application
Preparation is key to achieving a flawless application. Follow these steps:
4.1 Clean the Surface
Thoroughly wash your vehicle to remove dirt, grime, and wax. Use a pH-balanced car wash soap and ensure to rinse well. A clean surface is crucial for proper adhesion.
4.2 Inspect for Imperfections
Once clean, inspect the surface for any scratches, dents, or imperfections. Address these issues before applying the film, as they can affect the final appearance.
4.3 Create a Controlled Environment
Choose a shaded area or indoor space to work in, as direct sunlight can cause the adhesive to dry too quickly. Ensure the temperature is optimal (between 60°F and 80°F) for the best results.
5. Step-by-Step Application Process
Now that you’ve prepared your vehicle, it’s time to apply the Xpert Film. Follow these detailed steps:
5.1 Cut the Film to Size
Measure the area where you will apply the film and cut a piece slightly larger than needed. This allows for adjustments during the application process.
5.2 Wet the Surface
Using your spray bottle, apply a generous amount of soapy water to the surface of the vehicle where the film will be applied. This will allow you to reposition the film easily.
5.3 Position the Film
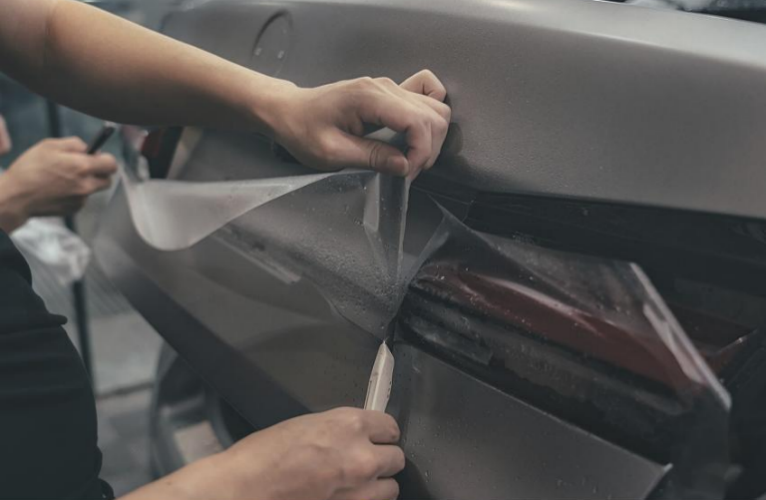
Peel the backing off the film and lay it onto the wet surface, ensuring it’s correctly positioned. The wet surface will allow you to slide the film into the perfect position.
5.4 Smooth Out Bubbles
Using the application squeegee, gently push out any air bubbles and excess water from underneath the film. Start from the center and work your way outwards to the edges.
5.5 Apply Heat
Once the film is positioned correctly and bubbles are smoothed out, use a heat gun to apply gentle heat. This will help the film conform to the vehicle's shape and ensure proper adhesion.
5.6 Trim Excess Film
After the film adheres well, use a utility knife to carefully trim any excess film along the edges. Be cautious not to cut into the vehicle’s paint.
6. Finishing Touches After Application
After the film has been applied, it's important to ensure everything is in order.
6.1 Inspect for Bubbles and Imperfections
Conduct a thorough inspection of the applied film for any remaining bubbles or imperfections. If you notice any, use the squeegee to push them out.
6.2 Allow for Curing
Let the film cure for at least 24 hours before exposing it to moisture or extreme temperatures. This ensures it adheres properly and lasts longer.
7. Maintaining Your Xpert Films
To keep your Xpert Films in optimal condition, follow these maintenance tips:
7.1 Regular Cleaning
Use a soft microfiber cloth and a mild detergent to clean the film. Avoid using harsh chemicals or abrasive materials that could scratch the surface.
7.2 Avoid Automatic Car Washes
Opt for hand washes instead of automatic car washes, as brushes and high-pressure water can damage the film.
7.3 Inspect Periodically
Regularly check the film for any signs of peeling or lifting. Address any issues immediately to prevent further damage.
8. Frequently Asked Questions
8.1 How long does Xpert Film last?
Xpert Film is designed to last several years with proper maintenance. Most manufacturers offer warranties that can range from 5 to 10 years.
8.2 Can I apply Xpert Film myself?
Yes, with the right tools and this guide, you can apply Xpert Film yourself. However, professional installation is recommended for complex shapes or larger areas.
8.3 What if I make a mistake during application?
If you notice mistakes during application, you can often lift the film and reposition it while it is still wet. If the adhesive has set, you may need to trim or replace the affected area.
8.4 Is Xpert Film removable?
Yes, Xpert Film can be removed carefully without damaging the underlying paint, provided it was correctly applied.
8.5 What types of vehicles can Xpert Film be applied to?
Xpert Film can be applied to most vehicles, including cars, trucks, and SUVs. It's versatile and can be customized to fit various shapes and sizes.
9. Conclusion
Applying Xpert Films to your vehicle can be a rewarding project that enhances its appearance and provides essential protection. By following this detailed guide, you can achieve professional results and enjoy the benefits of custom film application. Remember to prepare adequately, use the right tools, and maintain your films for long-lasting results. Whether you choose to apply the film yourself or seek professional help, mastering this skill will surely elevate your vehicle's style and durability.
Step-by-Step Guide: Applying Xpert Films to Your Vehicle Like a Pro
2025-10-05
The Ultimate Guide to Xpert Car Films: Enhance Your Vehicle with Quality Window Tinting
2025-09-28
Top Benefits of Installing Commercial Window Tint for Your Business
2025-09-21


